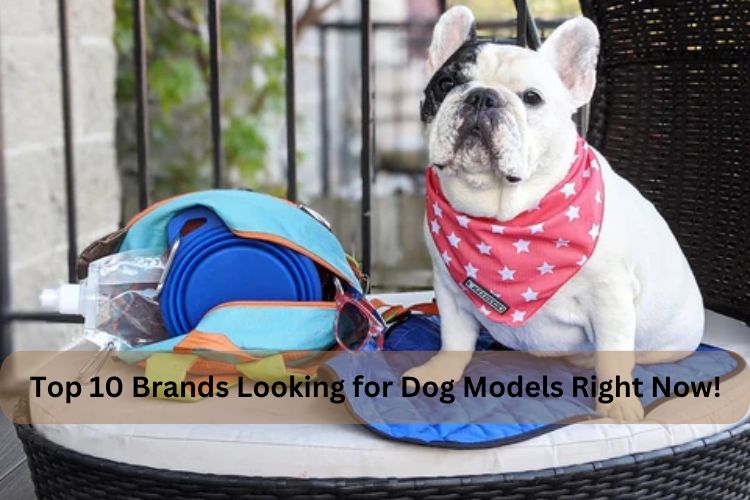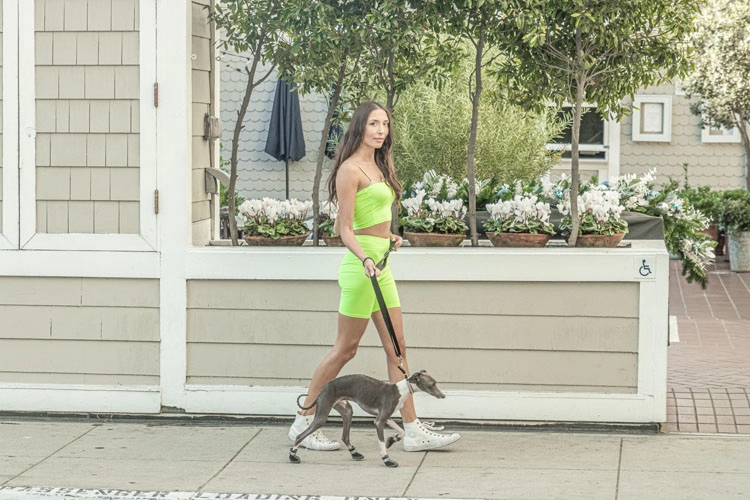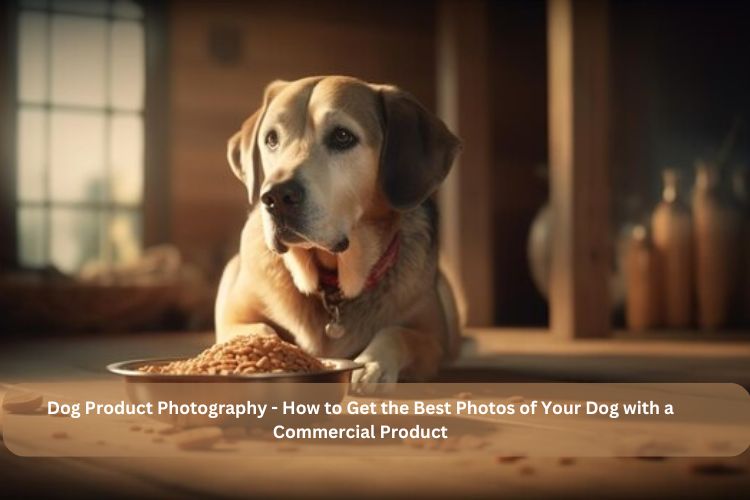
Dog Product Photography has become increasingly popular as pet owners and brands seek to capture the perfect images of dogs with commercial products. Whether you are a pet owner looking to showcase your furry friend or a business aiming to market pet products, mastering the art of pet product photography is essential. This comprehensive guide will take you through everything you need to know to get the best photos of your dog with commercial products.
Why Does Dog Product Photography Matter?
Dog product photography is more than just taking cute pictures of your pet with their favorite products. High-quality images play a crucial role in both marketing and personal use. Professional photos can significantly enhance product appeal for businesses, making items more attractive and convincing to potential buyers. This visual appeal can directly influence purchasing decisions, increasing sales and brand loyalty. On a personal level, well-captured images of your dog with products can create lasting memories and highlight the special bond you share with your furry friend. Investing in dog product photography ensures that these moments are captured beautifully and effectively, showcasing the best of your pet and the product.
-
Essential Equipment for Dog Product Photography
Mastering dog product photography is within your reach with the right equipment. Here’s a comprehensive guide to the versatile tools that will empower you to capture stunning images of your dog with commercial products.
Camera: DSLR vs. Smartphone
DSLR Cameras: A DSLR camera is a top choice for professional-quality photos. With superior image quality, manual settings control, and versatility, DSLRs allow you to adjust shutter speed, aperture, and ISO. These features are crucial for capturing sharp, well-lit images of your dog and the product, making them a worthwhile investment for dog product photography.
Smartphone Cameras: Don’t worry if you’re on a budget or just starting. Modern smartphones come with impressive cameras that can be used for dog product photography. They offer features like portrait mode, which can help blur the background and highlight your subject, making them an excellent choice for beginners.
Lenses: Choosing the Right Lens
Standard Zoom Lens (18-55mm): This versatile lens is excellent for everyday photography and can handle various shooting situations, from wide-angle to close-up shots.
Prime Lens (50mm f/1.8): Known for its sharpness and depth of field, a 50mm prime lens is perfect for portraits and product shots. It creates a beautiful bokeh effect that makes your dog and the product stand out.
Macro Lens: A macro lens is essential for capturing fine details of the product. It allows you to take close-up shots that reveal intricate textures and features.
Lighting: Natural vs. Artificial Lighting
Natural Light: Natural light is the best and most budget-friendly option for dog product photography. Shooting outdoors or near a large window can provide soft, even lighting. The golden hours (early morning or late afternoon) offer the best natural light, which can significantly enhance the quality of your dog product photos without costing you a dime.
Artificial Lighting: When natural light isn’t available, artificial lighting can help. Softbox, ring, and LED panels are popular choices that provide consistent, controllable lighting. They can help eliminate shadows and highlight your dog and product evenly.
Additional Gear: Tripods, Reflectors, and Props
Tripods: A sturdy tripod is essential for keeping your camera steady, especially in low-light conditions or when using a slow shutter speed. It also frees up your hands to manage your dog and arrange products.
Reflectors help bounce light onto your subject, reducing shadows and highlighting details. Reflectors come in various colors (white, silver, gold) to adjust the warmth and intensity of the light.
Props: Props can enhance your photos by adding context and interest. Choose props that complement the product and don’t overshadow it. Simple items like blankets, toys, and themed decorations can make a big difference.
Backgrounds and Backdrops
Seamless Paper: In various colors, seamless paper backdrops provide a clean, distraction-free background focusing on your dog and the product.
Fabric Backdrops: Fabric backdrops offer texture and depth. Choose neutral or complementary colors that enhance the product without clashing with your dog’s fur.
Portable Backdrops: These are convenient for on-the-go shoots and come in various designs. They are easy to set up and take down, making them ideal for indoor and outdoor photography.
Editing Software
Adobe Lightroom and Photoshop: These industry-standard programs offer powerful tools for editing and retouching your photos. They allow you to adjust exposure, color balance, and sharpness, ensuring your final images look professional.
Mobile Editing Apps: If you’re using a smartphone, apps like Snapseed and VSCO provide robust editing features on the go. They offer presets and manual adjustments to enhance your photos quickly and effectively.
Investing in the right equipment and learning how to use it effectively can significantly improve the quality of your dog product photography. Whether you’re a hobbyist or a professional, these tools will help you capture stunning images highlighting your dog and the product in the best possible light.
-
Preparing Your Dog and Product for the Photoshoot
Successful dog product photography starts with thorough preparation. Ensuring that your dog and the product are at their best will significantly enhance the quality of your photos. Here’s a detailed guide to help you prepare effectively.
Grooming and Hygiene
Tips on Grooming Your Dog to Look Their Best
Grooming is essential to make your dog look their absolute best in photos. Start with a suitable bath to ensure their coat is clean and shiny. Brush their fur to remove any tangles or loose hair, which also helps to give them a polished appearance. Please pay attention to their eyes, ears, and teeth, as these details can make a big difference in close-up shots. Trimming their nails and cleaning their paws will also contribute to an overall neat look.
Keeping the Product Clean and Presentable
The product you photograph should be spotless and free of any marks or smudges. Clean the product thoroughly before the shoot, ensuring no fingerprints, dust, or scratches could detract from its appearance. If the product is fabric-based, make sure it’s wrinkle-free. A clean, well-presented product enhances your photos’ overall aesthetic and professionalism.
Training and Behavior
Basic Commands Your Dog Should Know
A well-trained dog is crucial for a smooth photoshoot. Basic commands such as sit, stay, and lie down are essential for positioning your dog correctly. Teaching your dog to hold these positions for short periods will allow you to capture various shots without constantly readjusting. Additionally, commands like “look” can help direct your dog’s attention towards the camera or product.
How to Keep Your Dog Calm and Focused During the Shoot
Maintaining your dog’s calmness and focus is vital. Start by creating a comfortable and familiar environment for your dog. Use positive reinforcement techniques, such as treats and praise, to reward good behavior. Take regular breaks to prevent your dog from getting overwhelmed or fatigued. Keeping the sessions short and fun will help your dog stay engaged and cooperative throughout the shoot.
Choosing the Right Products
Selecting Products That Suit Your Dog
Choose appropriate products for your dog in size, color, and functionality. For example, a large dog will require different products than a small breed. Select items your dog can interact with naturally, making the photos appear more authentic and engaging. Consider the product’s purpose and how it complements your dog’s lifestyle.
Matching Product Colors and Styles with Your Dog’s Appearance
The colors and styles of the products should complement your dog’s appearance. For example, if your dog has a dark coat, choose products in contrasting colors to stand out. If your dog’s fur is light, brighter or more vibrant colors can create a striking visual effect. Additionally, consider the style of the product and how it matches your dog’s personality and look. A cohesive color palette and style will make your photos more aesthetically pleasing and professional.
By thoroughly preparing your dog and the product, you set the stage for a successful dog product photography session. Attention to grooming, proper training, and thoughtful product selection ensure that your dog and the product shine in every shot.
-
Setting Up the Perfect Environment for Dog Product Photography
Creating the ideal environment is crucial for achieving high-quality dog product photography. The right location, a comfortable space, and thoughtful use of backgrounds and props can make all the difference. Here’s how to set up the perfect environment for your photoshoot.
Choosing the Right Location
Indoor vs. Outdoor Settings
Indoor Settings: Indoor photography offers controlled lighting and a stable environment, reducing the risk of distractions. It allows you to set up professional lighting equipment and ensures consistent conditions regardless of the weather. However, indoor spaces may limit your background options and the natural light available.
Outdoor Settings: Outdoor photography provides natural lighting and a variety of backgrounds. Parks, gardens, and urban settings can add exciting elements to your photos. However, outdoor shoots can be challenging due to changing weather, unpredictable lighting, and potential distractions for your dog.
Pros and Cons of Different Environments
Indoor Pros:
- Controlled lighting and environment
- Consistent conditions
- Access to all equipment
Indoor Cons:
- Limited background options
- Possible space constraints
Outdoor Pros:
- Natural light enhances photo quality
- Variety of backgrounds and settings
- More space for creative shots
Outdoor Cons:
- Weather-dependent
- Potential distractions
- Inconsistent lighting conditions
Creating a Comfortable Space
Ensuring Your Dog Feels Safe and Comfortable
Your dog’s comfort is paramount for a successful photoshoot. Ensure the environment is familiar and free of hazards. Bring your dog’s favorite toys and treats to help them feel at ease. A comfortable dog is likelier to cooperate and display natural behaviors, resulting in better photos.
Arranging the Space to Highlight Both the Dog and the Product
Set up the space to draw attention to your dog and the product. Position the product prominently but naturally within the scene. Ensure enough space for your dog to move comfortably without knocking over equipment. Arrange the area to guide the viewer’s eye toward the focal points – your dog and the product.
Backgrounds and Props
Using Backgrounds to Enhance the Photo
Backgrounds play a crucial role in dog product photography. Choose backgrounds that complement the product and your dog’s appearance. Simple, uncluttered backgrounds work best to avoid distracting from the main subjects. Seamless paper, fabric backdrops, or natural settings can provide an appealing backdrop.
Incorporating Props Without Overshadowing the Product
Props can add context and interest to your photos but should be consistent with the product. Choose props that enhance the scene and complement the product. For example, a cozy blanket for a dog bed photo or a colorful toy for a playful shot. Ensure props are relevant and proportionate to the product and your dog.
By carefully selecting the location, creating a comfortable space, and effectively using backgrounds and props, you can set up the perfect environment for dog product photography. This thoughtful preparation ensures that your dog and the product are showcased beautifully, resulting in stunning, professional-quality photos.
-
Mastering Camera Techniques for Dog Product Photography
Mastering camera techniques is essential to elevate your dog product photography. You can create stunning, professional-quality images by understanding composition and framing, focus and depth of field, and how to capture the perfect moment. Here’s a detailed guide to help you master these techniques.
Composition and Framing
Rule of Thirds and Other Composition Techniques
The rule of thirds is a fundamental composition technique that significantly enhances photos. Imagine your frame is divided into nine equal parts by two horizontal and two vertical lines. Position your dog and the product along these lines or at their intersections to create a balanced and engaging composition. This technique draws the viewer’s eye naturally to the main subjects.
Other composition techniques include leading lines, which guide the viewer’s eye through the image, and symmetry, which can create visually pleasing and harmonious photos. Experiment with different angles and perspectives to find the most compelling composition for your dog product photography.
Framing Your Dog and Product Together Effectively
Effective framing ensures that both your dog and the product are the focal points of the image. Position the product prominently while ensuring it doesn’t overshadow your dog. Use natural frames like doorways, windows, or vegetation to add depth and context. Ensure both subjects are well-placed within the frame to maintain visual interest and balance.
Focus and Depth of Field
Achieving Sharp Focus on Both the Dog and Product
Sharp focus is crucial in dog product photography. Use autofocus for quick adjustments, but don’t hesitate to switch to manual focus for more control. Ensure the dog and the product are in focus, especially if they are at different distances from the camera. A smaller aperture (higher f-stop number) can increase the depth of field, ensuring both subjects are sharp.
Using Depth of Field to Create a Professional Look
Depth of field refers to the range of distance within a photo that appears acceptably sharp. A shallow depth of field (achieved with a larger aperture, like f/2.8) can create a beautiful bokeh effect, blurring the background and making your dog and the product stand out. A deeper depth of field (smaller aperture, like f/11) keeps more of the scene in focus, which helps highlight both subjects and the environment.
Capturing the Perfect Moment
Timing Your Shots for Natural Expressions
Capturing the perfect moment often means waiting for your dog’s proper expression or movement. Patience is key. Observe your dog’s behavior and be ready to shoot when they show natural, engaging expressions. Use a fast shutter speed to freeze motion, ensuring your images are sharp and clear.
Using Burst Mode to Catch Action Shots
Burst mode allows you to take multiple shots quickly, increasing your chances of capturing the perfect moment. This is especially useful for action shots, such as your dog playing with a product or moving through the scene. Review the burst of photos to select the best frames, ensuring you capture the most dynamic and expressive moments.
Additional Tips
- Lighting: Good lighting enhances all the techniques mentioned above. Whether using natural or artificial light, ensure your subjects are well-lit.
- Practice: The more you practice, the better you anticipate and capture the perfect moments.
Mastering these camera techniques can significantly improve your dog product photography. Understanding composition and framing, achieving the proper focus and depth of field, and capturing the perfect moment will help you create professional, captivating images that beautifully showcase your dog and the product.
-
Lighting Tips and Tricks for Dog Product Photography
Lighting is a critical aspect of dog product photography. The proper lighting can highlight details, create mood, and enhance the overall quality of your images. Here’s a detailed guide on effectively using natural and artificial lighting and tips to avoid common lighting mistakes.
Natural Light Photography
Best Times of Day for Shooting Outdoors
The best times to shoot outdoors are during the golden hours – shortly after sunrise and just before sunset. During these times, the sunlight is soft, warm, and diffused, reducing harsh shadows and creating a pleasing, natural glow. Avoid shooting in the middle of the day when the sun is directly overhead, as this can create harsh shadows and overexposure.
Using Natural Light Indoors
Indoors, position your setup near a large window to take advantage of natural light. North-facing windows typically provide the most consistent light throughout the day. Use sheer curtains to diffuse the light and soften shadows. Reflectors can help bounce light onto your dog and the product, ensuring even illumination.
Artificial Lighting Solutions
Types of Artificial Lighting for Indoor Shoots
When natural light isn’t available or sufficient, artificial lighting is a great alternative. Standard artificial lighting options include:
- Softbox Lights: Provide soft, diffused light that mimics natural light, reducing harsh shadows.
- Ring Lights: Excellent for close-up shots, offering even illumination with minimal shadows.
- LED Panels: Versatile and adjustable, suitable for various lighting needs, and easy to set up.
How to Set Up and Use Studio Lights Effectively
Position your lights at a 45-degree angle to your subjects to create natural-looking shadows and depth. Use multiple lights to achieve balanced lighting:
- Key Light: The primary light source is on one camera side.
- Fill Light: Placed opposite the key light to fill in shadows and reduce contrast.
- Back Light: Positioned behind your subjects to separate them from the background and add depth.
Adjust the intensity and distance of your lights to control the overall brightness and shadow softness. Use light modifiers like diffusers and reflectors to shape and soften the light as needed.
Avoiding Common Lighting Mistakes
Dealing with Shadows and Harsh Light
Shadows and harsh light can be problematic in puppy product photography. To manage these, use diffusers to soften direct light and minimize harsh shadows. Reflectors can help fill in shadows by bouncing light back onto your subjects. Experiment with light angles and distances to achieve the desired effect.
Balancing Light to Avoid Overexposure or Underexposure
Achieving the right balance between light and shadow is crucial to avoid overexposure (too much light) or underexposure (too little light). Use a light meter or your camera’s histogram to monitor exposure levels. Adjust your camera settings (ISO, aperture, shutter speed) and light intensity to achieve balanced exposure. Always check your photos on your camera’s display to ensure proper lighting and make adjustments as needed.
Additional Tips
- Consistency: Maintain consistent lighting throughout your shoot to ensure uniformity across all images.
- Practice: Regularly experiment with different lighting setups and techniques to understand their effects and improve your skills.
By mastering these lighting tips and tricks, you can significantly enhance the quality of your pet product photography. Properly using natural and artificial lighting and avoiding common mistakes ensures your photos are well-lit, balanced, and professional, effectively showcasing your dog and the product in the best possible light.
-
Post-Processing and Editing for Pet Product Photography
Post-processing and editing are essential steps in Pet product photography. They allow you to refine your images, enhance their visual appeal, and ensure a professional finish. Here’s a detailed guide on basic and advanced editing techniques and software recommendations to help you achieve stunning results.
Basic Editing Techniques
Cropping and Adjusting Composition
Cropping is a simple yet powerful tool that can significantly improve your photo’s composition. By removing unwanted elements from the edges of the frame, you can focus attention on your dog and the product. Use cropping to apply the rule of thirds or other composition techniques, ensuring your subjects are well-placed and balanced within the frame.
Enhancing Colors and Brightness
Enhancing colors and brightness can make your photos more vibrant and appealing. Adjust the white balance to ensure accurate and natural colors. Increase the saturation and vibrance slightly to make the colors pop without looking unnatural. Adjust the exposure and brightness to ensure the image is well-lit. Use the contrast slider to add depth and definition.
Advanced Editing Tips
Retouching to Remove Distractions
Retouching helps remove distractions and imperfections, ensuring a clean and polished image. Use tools like the clone stamp or healing brush to remove unwanted objects, blemishes, or stray hairs. Pay attention to the background and foreground to ensure nothing detracts from your dog and the product.
Using Filters and Effects for a Professional Finish
Filters and effects can enhance the mood and style of your photos. Use them sparingly to avoid over-processing. Subtle adjustments can add a professional touch, such as adding a vignette to draw attention to the center of the image or using a gradient filter to enhance the sky or background. Experiment with different effects to find what complements your style and the product you’re showcasing.
Software Recommendations
Best Software for Photo Editing
Adobe Photoshop is the industry standard for photo editing. It offers powerful tools for basic and advanced edits, ideal for retouching, compositing, and applying intricate photo adjustments.
Adobe Lightroom: Lightroom is perfect for managing and editing large batches of photos. It offers a range of tools for adjusting exposure, color, and composition, along with powerful organizational features. Its non-destructive editing process allows you to make changes without altering the original image.
GIMP: A free and open-source alternative to Photoshop, GIMP provides a wide range of editing tools suitable for detailed retouching and manipulation.
Mobile Apps for On-the-Go Editing
Snapseed: Snapseed offers comprehensive editing tools and filters, making it a top choice for mobile editing. Its intuitive interface allows for precise adjustments, making enhancing your photos on the go easy.
VSCO: VSCO combines powerful editing tools with a vast collection of filters. It’s great for quick edits and applying consistent styles across your photos.
Adobe Lightroom Mobile: Lightroom Mobile offers many of the same features as the desktop version, allowing you to edit, organize, and share your photos from your smartphone. It’s beneficial for editing RAW files on the go.
Additional Tips
- Backup Originals: Always keep a backup of your original photos before making any edits.
- Consistency: Apply similar edits to maintain a consistent style across your portfolio.
- Learning Resources: Utilize tutorials and online courses to improve your editing skills and stay updated with the latest techniques.
Mastering these post-processing and editing techniques can elevate your puppy product photography professionally. Whether cropping and adjusting composition, enhancing colors, retouching distractions, or applying filters, the right tools and techniques will ensure your photos are polished and visually captivating.
-
Showcasing Your Photos
After capturing and editing stunning images of your dog/pet with commercial products, the next step is to showcase your work effectively. Whether you’re a professional photographer or a passionate hobbyist, presenting your photos in the best possible way is crucial. Here’s a detailed guide on creating a portfolio, building your online presence, and using physical displays to showcase your pet product photography.
Creating a Portfolio
Organizing Your Best Shots into a Professional Portfolio
A well-organized portfolio is essential for displaying your best work. Start by selecting your top images that highlight your skills and creativity. Focus on quality over quantity; a concise collection of high-quality photos is more impactful than a large, inconsistent gallery. Group similar images together to create a cohesive flow, such as action shots, close-ups, and themed series.
Tips for Presenting Your Work to Potential Clients
Consider digital and physical formats when presenting your portfolio to potential clients. A professional website must offer easy navigation, high-resolution images, and relevant information about your services. Include client testimonials and case studies to build credibility. Additionally, consider creating a printed portfolio or photo book for in-person meetings, allowing clients to appreciate the tactile quality of your work.
Social Media and Online Presence
Best Platforms for Sharing Your Dog Product Photography
Social media is a powerful tool for reaching a wider audience. Instagram is particularly effective for visual content, allowing you to share high-quality images, behind-the-scenes shots, and stories. Use relevant hashtags, geotags, and engaging captions to increase visibility. Facebook is another excellent platform for sharing albums, engaging with pet communities, and running targeted ads.
Pinterest is excellent for showcasing your work in curated boards, driving traffic to your website, and connecting with a community interested in pet photography. Don’t forget about LinkedIn for professional networking and sharing your portfolio with potential clients in the pet industry.
Engaging with Your Audience and Building a Following
Consistency is critical to building a following. Post regularly and interact with your audience by responding to comments, asking questions, and hosting giveaways or photo contests. Share tips and behind-the-scenes content to add value and connect with your audience personally. Collaborate with pet influencers and brands to expand your reach and gain credibility in the dog product photography niche.
Printing and Physical Displays
Options for Printing High-Quality Photos
High-quality prints can make a lasting impression. Choose professional printing services that offer a range of options, including glossy, matte, and metallic finishes. Consider printing on canvas, acrylic, or metal for a modern and durable presentation. Ensure the printing service uses archival-quality materials to preserve the longevity of your prints.
Ideas for Physical Displays and Exhibitions
Physical displays can showcase your work in a tangible and impactful way. Consider these ideas for displaying your dog product photography:
- Exhibitions: Participate in local art shows, pet expos, and photography exhibitions to reach a broader audience. Create themed displays to tell a compelling story through your photos.
- Pop-Up Galleries: Organize pop-up galleries in pet stores, cafes, or community centers—partner with local businesses to attract their customers and increase your visibility.
- In-Store Displays: Collaborate with pet stores to feature your photography in their displays. This will showcase your work and promote the products you photograph.
- Client Gifts: Offer high-quality prints or photo books as gifts to your clients. This personal touch can leave a lasting impression and encourage word-of-mouth referrals.
You can attract potential clients and build a loyal following by effectively showcasing your dog product photography through a professional portfolio, a robust online presence, and creative physical displays. Whether online or offline, presenting your work in the best possible light will help you stand out in the competitive field of dog product photography.
Conclusion
Mastering the art of dog product photography involves:
- Understanding the essentials of equipment.
- Preparing your dog and product.
- Setting up the perfect environment.
- Honing your camera techniques.
Creating stunning dog product photos is not just about the subject, but also about the way it’s presented. Effective lighting and post-processing play a significant role in this process. They can transform a simple image into a captivating one, showcasing your furry friend and the commercial product in the best possible light.
As you embark on your dog product photography journey, consider partnering with top-tier dog models to elevate your work. Ferrovax is renowned as a top commercial dog model provider, offering exceptional models for product photoshoots, commercial ads, and even movie actors. Their well-trained, photogenic dogs ensure that every image captures the perfect blend of charm and professionalism. You can also train your dog to be a model by following simple steps from our ” Modeling a Dog – How to Make Your Dog a Model?” or “How to Get Your Dog into Modelling? – Ferrovax“
By following these comprehensive tips and leveraging Ferrovax’s expertise, you can achieve professional-quality dog product photography that stands out in the competitive market. Start capturing those perfect moments and confidently showcase your products’ beauty and appeal.